Hi, my name is Kelli, and welcome to Mostly Native. Today we’re going over winter sowing. This is the foolproof method of sowing seeds. I’m dropping some serious gems in this video, so get ready to take screenshots, take notes, and save this video to your favorites so it’ll be in your back pocket for later.
I’m going to talk about three different winter sowing methods. We are also going to go over how to winter sow six different native plants. There is loads of information in this video. We’re talking lessons learned. We’re talking best practices and more. Check out my website at mostlynative.com. A materials list will be available along with step-by-step instructions and the plant information cards you’ll see in this video in the next few days.
If you enjoy this video, like comment, share, and subscribe. Now let’s get into these materials.
You’ll need a clear plastic container. That is a number five plastic. If you look at the bottom, you’ll find the number in a little triangle like that. That PP stands for polypropylene. Number five is going to be your best option. It’s food safe and it holds up to sunlight. It is very, very strong. This is like sturdy. If you use something like a milk jug or something like that, which you could use, that plastic is going to be thinner.
What I don’t like about the number two is that it can leach endocrine disruptors into the soil. I’ve read some conflicting information about that. Some places say that it’s just only a tiny bit. Other places are like no! Warning, it’s ruining the planet. But what an endocrine disruptor does is it negatively affects the plant’s ability to grow their roots.
MATERIALS LIST
- No. 2, 4, or 5 plastic container
- No. 5 recommended
- Organic coffee filters
- Tool to put holes in the container, i.e.,
- Drill
- Incense stick
- Soldering tool
- Knife
- Organic Potting Mix
- Garden Marker or Sharpie
- Plant Marker/Plant Label
- Scooper
- Measuring Tape
- Tape if using a milk jug as a container i.e.,
- Painters tape
- exterior surface recommended
- Duck Tape
- Painters tape
So that’s that sounds like a problem for me. I know that number five does not do that. So I would recommend just do the number five. Another thing that I’ve learned about using the milk jugs is that this is a lot of work. So if you’re going to use like a milk jug, you have to cut that like, so you would leave this part uncut so that way it acts as a hinge and then you will have to take tape to seal that back up, as opposed to just using a container that you don’t have to do any of that cutting and you get one that has a lid.
So this particular one that I’m using is exceptionally marvelous. It has handles on it. Now, I don’t know if you’re going to be as lucky to find this. I got this from a store in Ohio that doesn’t exist anywhere else. But I don’t know, maybe you can find this somewhere. It says Life Story on there. And it comes in different sizes. You want to make sure that the height is at least about five or six inches tall. I would say six inches because you’re going to end up putting four inches of dirt in here. So just to give it some room.
You’re also going to need some organic coffee filters. I say organic because I like no toxins, if possible. So you’re going to go with organic coffee filters and then you’re also going to need some type of tool to put holes in the bottom of your container. I’m going to use my drill, but you can use a knife. I used a knife last year when I did it. You can also use something like an incense stick and just have it burning and burn holes into the container.
Another important thing is that you want to make sure that your container is clear because you don’t want a dark colored container because that’s going to absorb more sunlight. It’s going to make the soil too hot and it’s also going to make your seeds and your plants hot. So you don’t want to cook your plants. So go with a clear one.
Then you also want to get some potting mix, not potting soil potting mix. Your potting mix is going to be free of bacteria and pathogens. Potting soil may have that in there. And another thing that’s good about the potting mix is there are going to be no viable seeds in there. So you don’t have to worry about growing your plants and then a bunch of seeds from weeds pop up and you get confused and think, look at all these great plants I grew. And it turns out that those are weeds. So make sure you get potting mix.
Another thing to note is this particular container is pretty long. Now I do have containers that aren’t this wide but for plants that I’m growing where my seed pack has like a lot of seeds in them, I’m going to go with this long container. The one that I’m doing today, incidentally, has 400 seeds. So that was another lesson that I learned last year when I did the winter sowing is that pay attention to how many seeds you’re putting in there because the crazy thing about this method is it really works. So as long as you have viable seeds, it’s going to work. And you know, if you can imagine 400 plants growing inside of a water jug, that’s going to be pretty crazy. And it’s hard to separate those plants from each other. So this, in my opinion, is the easiest way to do it, using a container with a lid. And if you can find some like I did with these beautiful handles even better.
Optionally, you may want to use some type of scooper. I’m actually going to buy one. This is just a measuring cup I’m using. But you could also use like a bowl if you wanted to. A cup, a mug. Be creative, whatever you want. Or you can just go all manual and use your hands. But the scooper may make everything less messy.
Lastly, you’re going to need some type of garden marker, or you can use some type of sharpie. I’ve read conflicting information as far as that goes. I’ve read that garden markers don’t work. I’ve read that Sharpies don’t work. So it’s just to your discretion. Last year I used a garden marker, and I will say that I believe that it depends on what material your garden stakes are. Like I’m using plastic this year. Last year I had wooden garden stakes and the wood kind of messed up. Like I still couldn’t see what I wrote on there. So I’m hoping that the plastic will be better. So we’ll see how that turns out.
WINTER SOWING INSTRUCTIONS
Your next step is going to be to just drill holes or put holes in there, whatever way you decide to do it. Put some holes in the bottom of the container. So these are the holes. I just did these randomly. So you’ll just use your discretion on how many you want to put, but just put enough where the water can adequately drain. In this, I have, let’s see. One, two, three, four, five, six, seven. Now, what you will notice with this is that because this plastic is kind of thick, you’ll get little pieces like that kind of sticking in. So what I found to be the easiest is just to take the drill and do it the reverse way to get that excess plastic off. Well, I can’t hold it and do it. But if you can imagine, just go the opposite way, like that, and that will make it so you can disconnect that and just rip it off with your fingers.
Next, you want to put the lid on and put some holes in the lid. You want to make sure that you are not pushing downward with your weight. Let the drill do the work for you. Depending on how tough your container is, it might take a little time compared to how long it takes to put the holes in the bottom. That’s just my experience with this particular container. But what I’m noticing is a really good technique is if you kind of start off by going straight, once you kind of get a little indentation, turn your drill sideways, well, head into it like that and then pull it back out. If you do it like that, it can kind of help to prevent you from putting your body weight accidentally and putting a crack in the lid so it won’t look like that. But it really doesn’t matter really, because all that’s going to do is let some snow and any type of water or rain get in there also. So it’s not a big deal. But if you want it to be nice and clean and have these round beautiful circles, just don’t put a lot of body weight on there. So I’m going to do about two more of these holes.
Once you get those holes relatively clean and you don’t have any excess plastic on the top, and you also want to make sure that’s relatively flat, because now what you’re going to do next is put some coffee filters over those holes to try to prevent slugs from going up in your plants. Also, you want to make sure that you get rid of any excess plastic that’s in your container.
I’m taking just a damp paper towel and just wiping this out. So now we’re just putting our coffee filters on the holes. If you want, you can open these and tear these in half so it can take up more space just using one. But I’m not doing that. I did tear these last year when I did this, and I still did get some slugs. So this is an experiment. Let’s see if not tearing them can make it so I get zero slugs.
Next, you’ll need to see how far up this container four inches really is. So I see where it is. It’s kind of maybe almost halfway between that last line on this container. If you want, you can just make a mark. But I’m not, so I’m going to keep that in my brain. And next, we’ll fill it up with some potting mix. Put on some gloves, people. Protect yourself.
While you’re putting your soil in here or your potting mix, you want to make sure that you’re just loosely adding that potting mix. Don’t compact it. When you’re done, just go ahead with your hand and just kind of lightly even it out. You can kind of pat it down just so you can make sure you have enough in there. You may want to just double check. Get your handy dandy measurer and make sure you’ve got about four inches. That looks pretty good to me.
So this is how the top came out. I got a bunch of holes drilled in ready made with my little crack. We’re going to pretend like that’s not there. Excuse me. I don’t think that’s going to matter. Really. I got a little garden marker right there. Bam! And I went ahead and made me a couple (a few) lines right there with my finger. If you want to use a stick or whatever you want to use, that’s fine. You don’t even have to do it like that, period. But I did that because that particular seed needs to be covered up with a little bit of soil.
But right here we’ve got our iris versicolor, which is also known as northern blue flag.
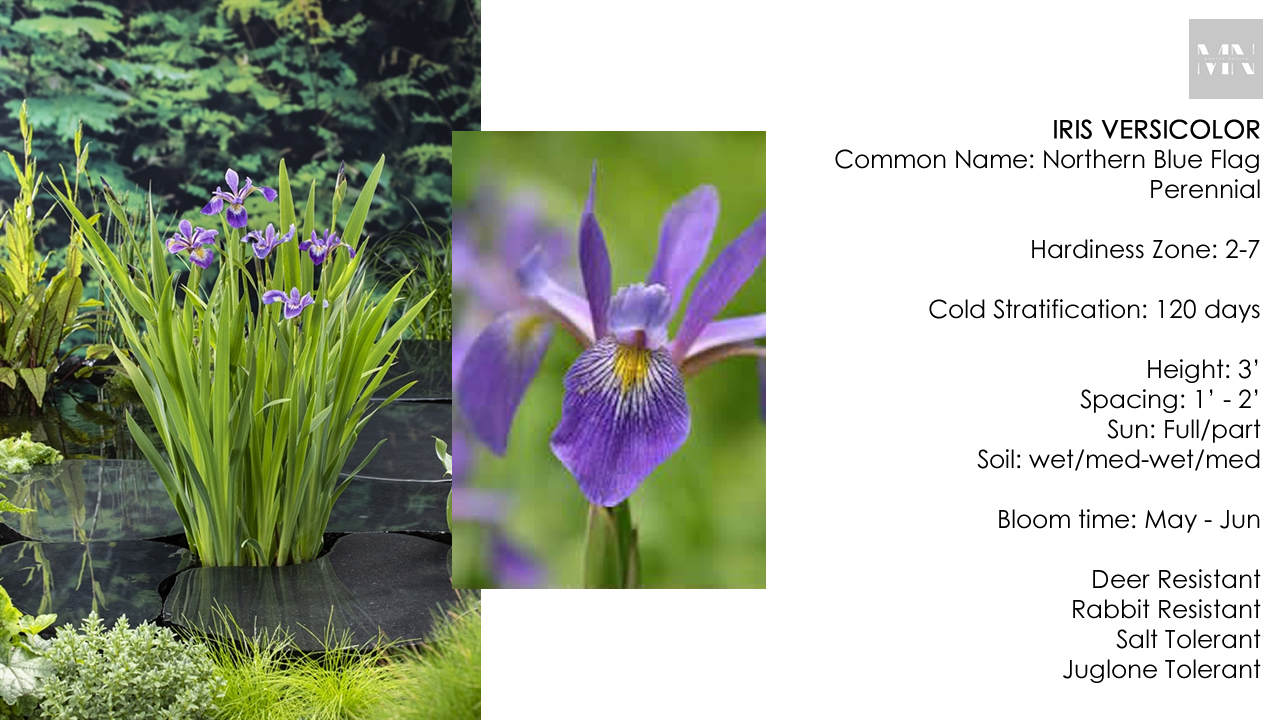
That particular plant needs to stay in there for 120 days getting some cold weather, a.k.a. cold stratification. So when you hear that word, that just means that’s how long it needs to sit in the cold. So it’s January 1st, 2024. And I just realized that I wrote 2023 on all of my little markers. So that’s something I do every year; write the wrong year for at least two months straight.
But next, we’ve got our chelone glabra. Am I saying that right? Who knows? I don’t know. But it’s also known as turtle head, and I sprinkled that in. There’s a lot of seeds in the pack that I had. There were 300. I didn’t put them all in here, but I just sprinkled what I could. I really couldn’t control how many were kind of coming out my hands.
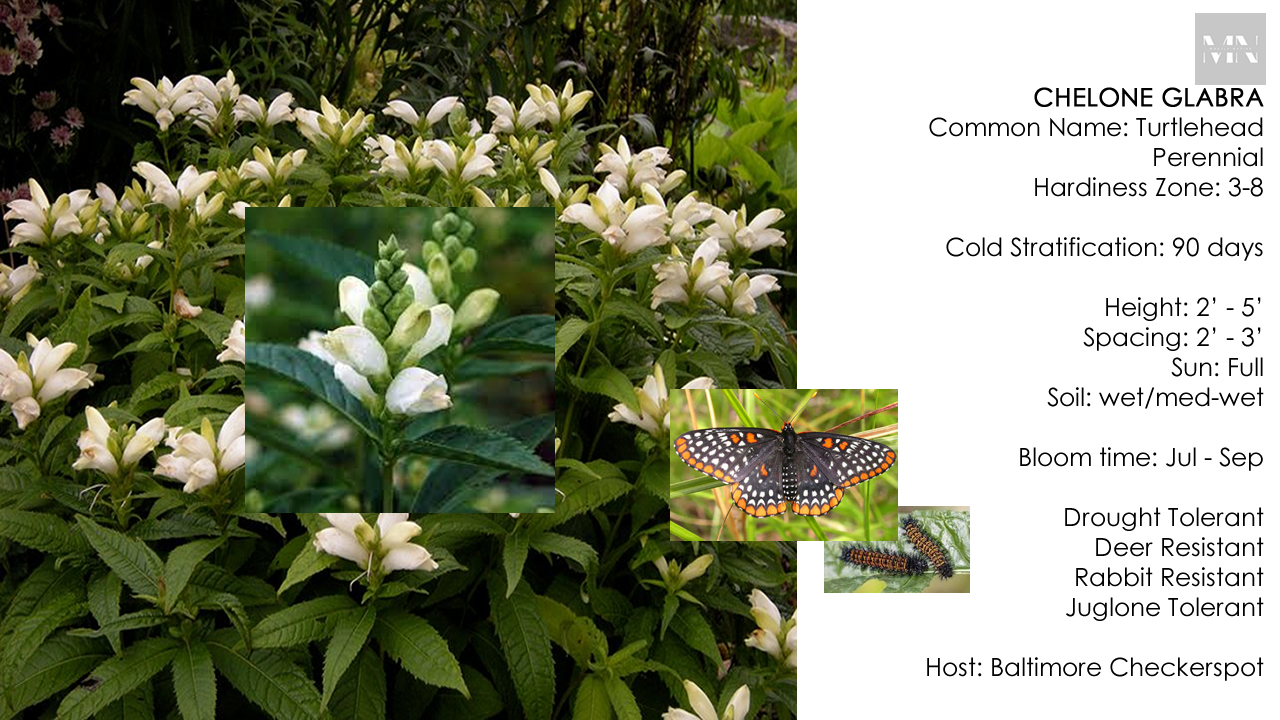
But I tried to control it. But that needs to stay cold-stratified for 90 days.
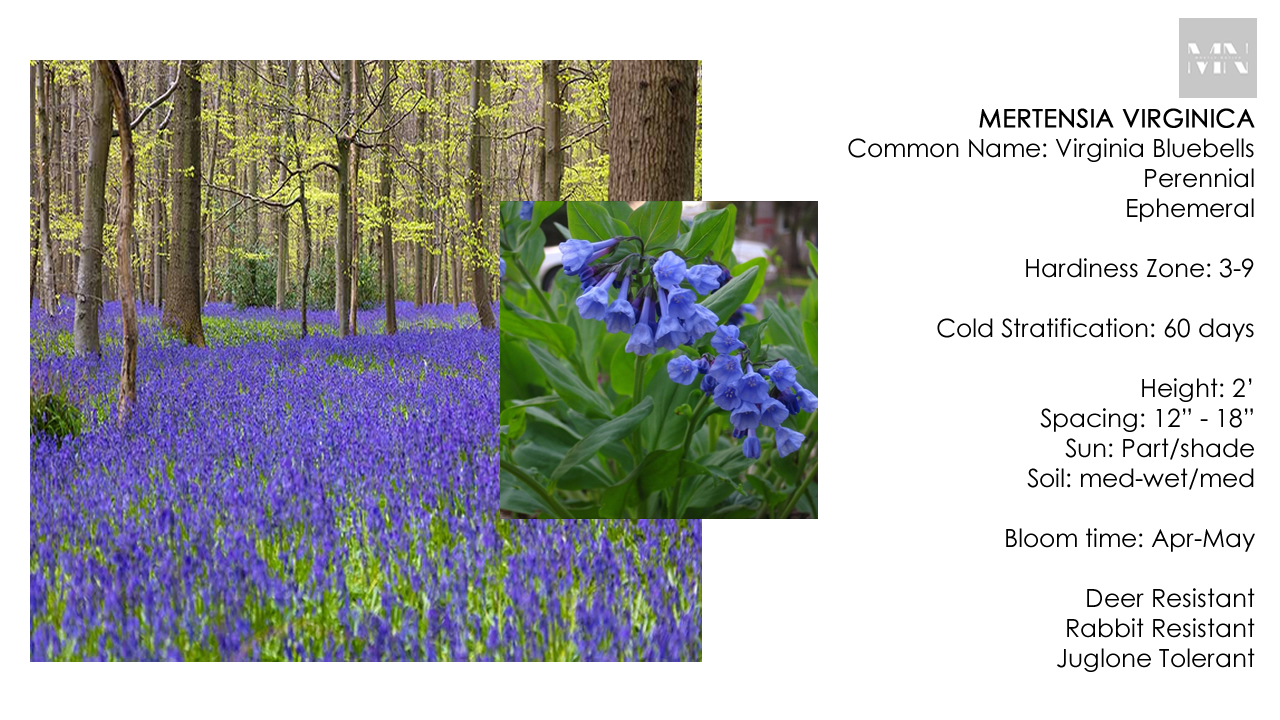
And then we’ve got mertensia virginica a.k.a Virginia Bluebells. I had 75 seeds of those. I sprinkled those in there, I just need a dust of soil to cover those up. Those need to stay cold-stratified for 60 days.
And last but certainly not least, we’ve got phlox pilosa a.k.a prairie phlox. That’s going to need to stay cold-stratified for 60 days as well.
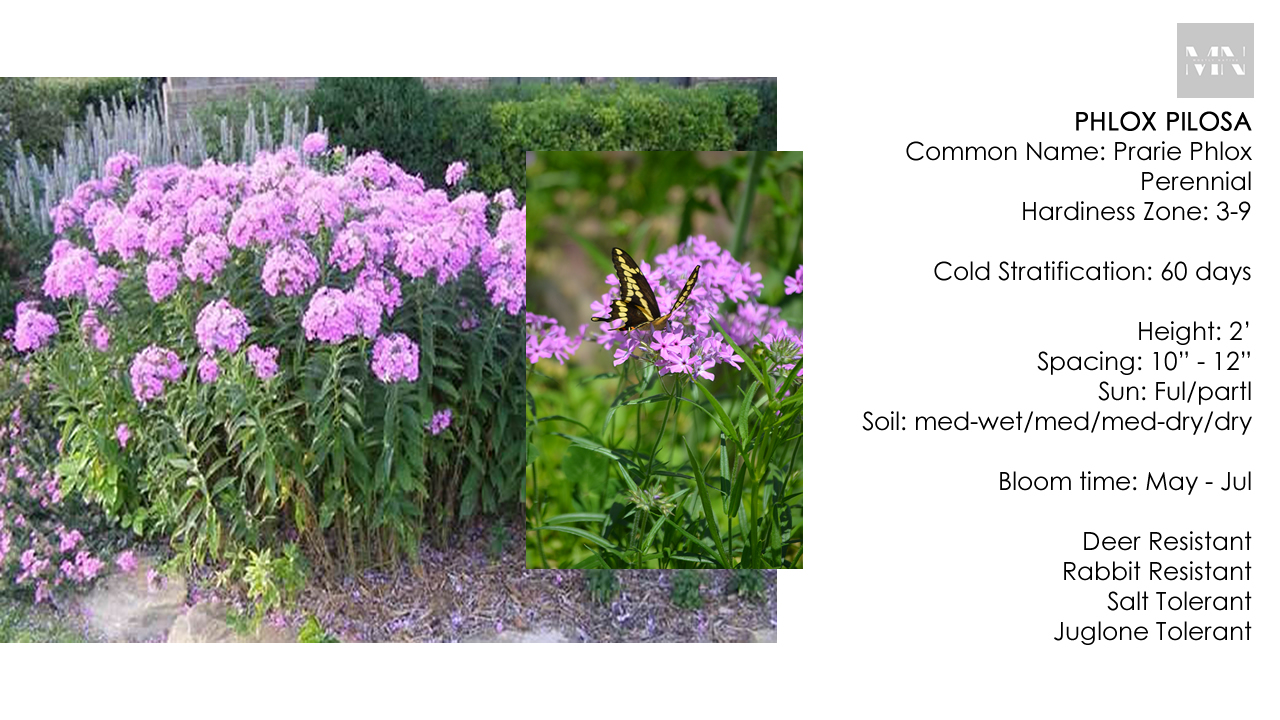
And I’m just going to cover that up with a light dusting of soil. So now I’m going to go ahead and cover these up and then I am going to take them outside, take this whole basket outside with the top on it. And once I get out there, I’ll take the top off. I’m going to just water this a little bit to get it completely moist and I’ll just leave it in an area where I know it will receive sun and you really don’t have to do too much after that.
You just let nature do what it does. It’s going to snow on here. We’re going to count on some snow getting into my little tiny holes. Well they’re not that tiny, but they’re big enough where they’ll be able to let some snow inside of here. And when you get days that are like kind of warm, you want to come out and take the top off because you don’t want to cook your seeds. And when it’s approaching spring and it starts to warm up more consistently, you’ll go ahead and take that top off completely. So you guys come back and we’ll see what we got going on.
This is the first time that I’ve actually put seeds in the same container that are different types of plants. So hopefully these are going to look different from each other to the extent that I’m going to know that they are different plants. I’m also kind of assuming that some of these seeds may shift around just when the water hits it. So we’ll see.
But I’m trying this different this year. Like I said, I used the milk containers last year and I’m still going to use for some plants that I don’t have that many seeds for. But the problem that I ran into with those milk containers was that it was just so many seedlings in a small space. And because it’s just me and I’m trying to like plant ten kazillion plants in my yard, they were just getting larger and larger and larger. It made it very difficult to pull those plants apart. So I’m hoping that this is going to work better for me this year for plants that I have at least more seeds that I want to try to grow into plants.
You know, and even these … really large ones, you know, maybe yeah, I could have put those by itself. But this is the only plant that I have seeds for that requires 120 days of stratification.
So if you notice, you know, there is a kind of reason I put these in this order. I’ve got the one that needs to stay in the cold the longest there, the next longest next to that. And then both of these have the same cold stratification period. So hopefully I don’t have to bother each section as much going down the line once I start pulling these out to transfer into either containers or the earth.
Okay. This option is either using a gallon milk container or water container. So this is just cut in the middle. Well not the middle enough… like, right underneath the handle here. So that way you can turn this into, like, a hinge. So I cut that out like so. I put some slits in the bottom using a knife, and now I just add these coffee filters in the bottom like that with the same hopes as the other one… other container, which is to try to keep slugs from coming in there. In my experience, it doesn’t really work, but I don’t know how many slugs would have gotten into the plants if I hadn’t have used these. So I’m still going to put them in there.
This is I’m just using this. It’s organic coffee filters. So there’s like no dyes or anything like that.
All right. Now I’m going to fill this up with about four inches of dirt and then add my seeds. Okay. I had 25 seeds of viola striata which is a violet.
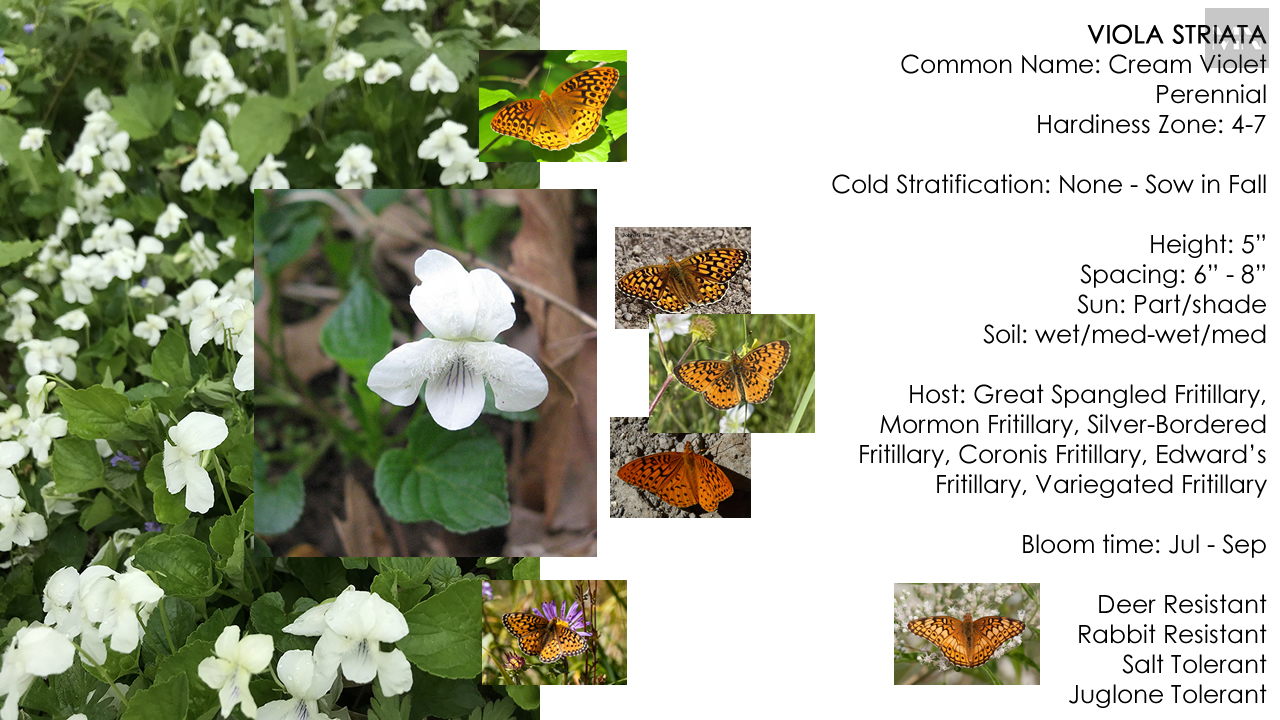
It’s, you know, all this stuff is native, by the way, but it’s also known as cream violet. This doesn’t really require cold stratification, but from what I understand, it’s recommended that these go out in the fall. So I want to get these outside right away. I don’t know if you can see these little tiny seeds, but there’s one. I’ve seen smaller, actually. And I’m trying to show those little circles right there. But that’s what the seeds look like. These are actually going to require a quarter inch of potting mix be placed on top of these.
Here we have our prairie smoke. The scientific name is geum triflorum.

If you can see those seeds. Yeah. They look like little sparse little things there. But we’ve got that in there. I put 80 seeds in this container. You can see it on top of that other one. It’s about half the size of that first container. And I’m only going to put an eighth inch of soil on top of this.
And our last one, we’ve got aquilegia canadensis.
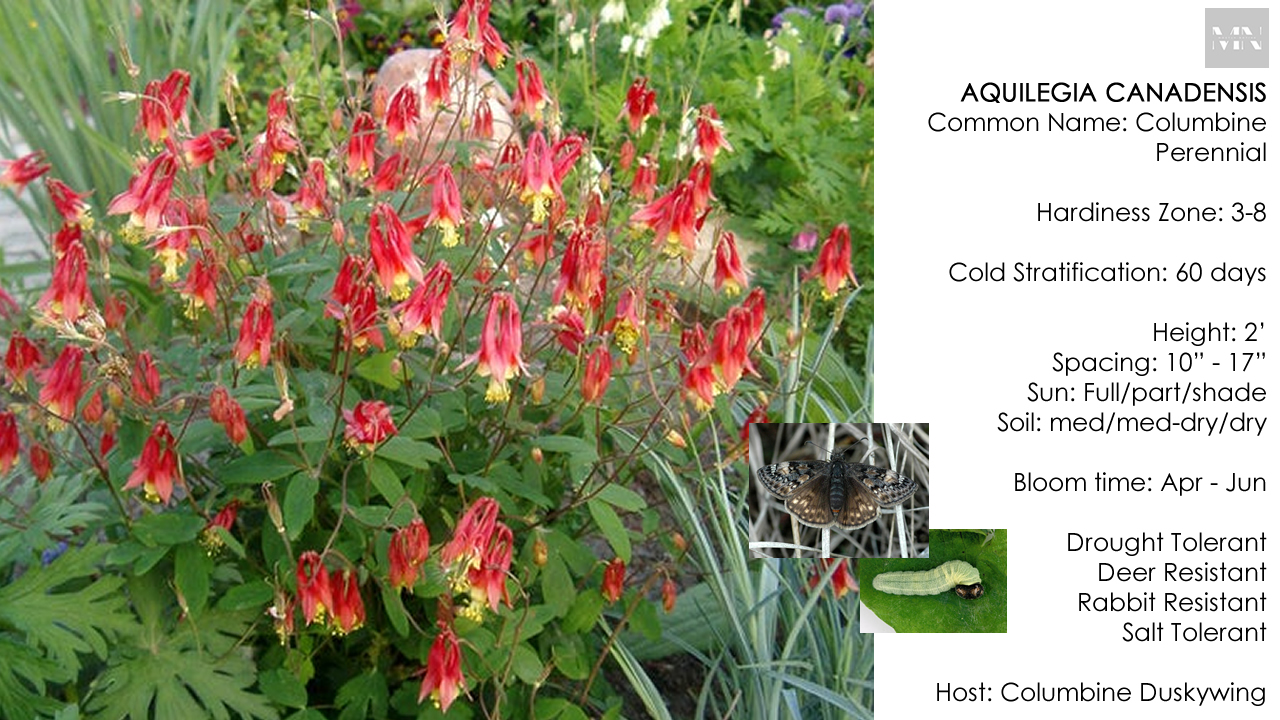
These seeds were so small, I can’t see them. Well you know, I can see them in this camera, though. They look like little tiny specks. But this particular one is going to require an 1/8 inch of soil on top as well. Both of these require 60 days of cold stratification.
You’ll also want to make sure that you lightly tamp that soil down after you put it on top of your seed. And even the ones that are just thrown directly on top, if you have seeds like that, you still want to just kind of pat that down. Not hard. Just gently pat it down so it makes some good contact with the soil.
So I’m going to go ahead and do the same thing with these and take these outside, find a nice little spot that can get some rain and some sun and some snow. Put these tops on after I water them and after I water this viola, I’m going to have to seal that up with some tape.
I’m going to use this tape, Scotch painter’s tape. But really, it’s up to you what you use. Some people used even duct tape. It’s up to you. What I’ve read about duct tape is people find it hard to take off, but it’s really just going to be up to you.
For me so far, I think I used blue painter’s tape last year. I don’t remember. But whatever it was, I know it was painter’s tape, but it was kind of coming off. Especially after I had to open them on warmer days. It didn’t really hold as far as the stickiness, the after I tried to put those back in.
This option is utilizing a food container. This was actually a container for some Kiwi that I just bought from the grocery store. What I like about this one is looky here, there’s already a lid on it. There’s already lots of holes in it, not only at the top, there’s holes at the bottom too.
But it’s the same technique as far as I put the coffee filters in the bottom, I added some dirt, and then I added some seeds. Of course, this is only going to work if you don’t have that many seeds. But there are 18 seeds in here, which is great.
And this is for podophyllum peltatum, also known as May Apple.
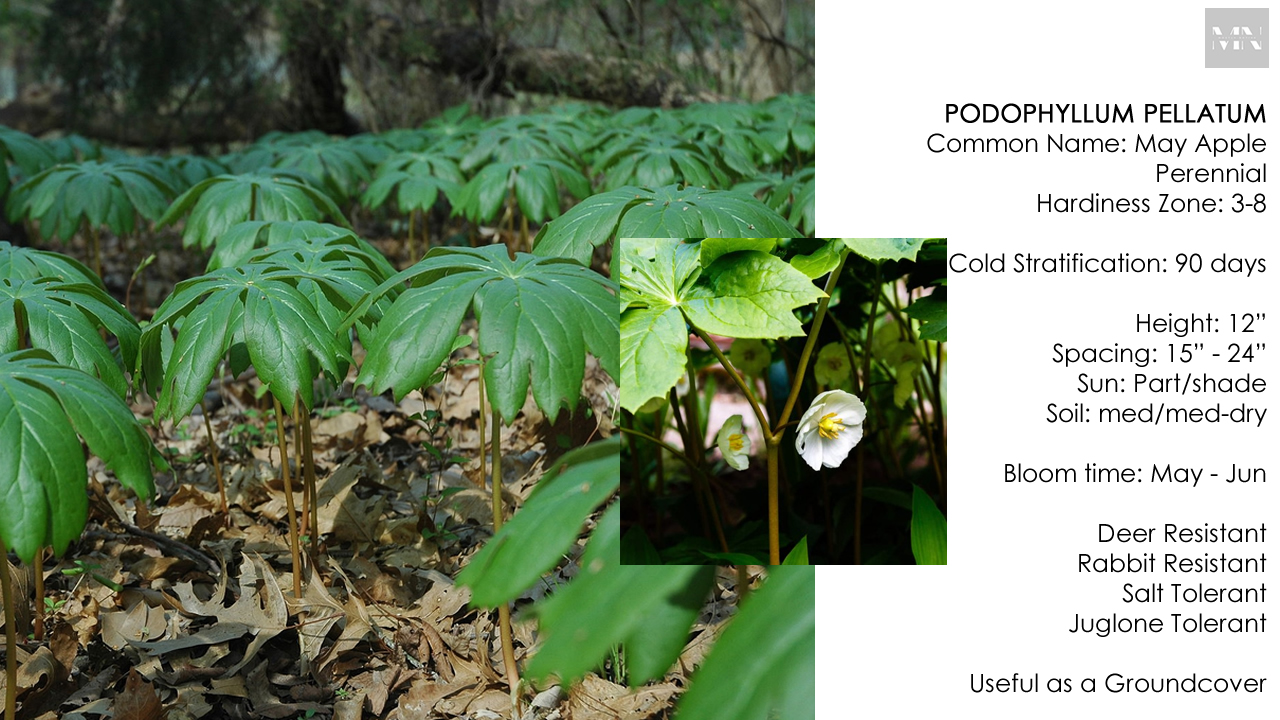
And I have my little tag in there. This needs to be cold stratified for 90 days and it is currently January 4th, 2024. So it’s a couple of days later. But I’m going to do the same thing with this one.
This one only requires a light dusting and then I’m just going to gently pour water on top of this, close this up and put this outside with the rest of the containers.
But of note is this as well. If you have some type of plant saucer or something you can put down that will retain water, it’s I found a good idea to do. Not necessarily now, but when it starts getting warmer, it becomes a lot easier to just pour water in the saucer so that way you can keep your seeds wet, your plant, and your soil moist so the plants can still get some water because you will need to do that every so often. So that’s something to think about as well.
All right. I did a light dusting of soil on top of here. I want to add this too about this may apple. I soaked these in some really warm water. And it did cool off, but I let that sit for 24 hours before I started growing these. I’ve read that you have to do like a double dormancy period. Meaning like I’m planting these this winter, like they wouldn’t sprout this coming spring until they go through another a second winter cycle and then would germinate that second spring. But I’ve also read that soaking them in warm water and in water overnight would make them germinate this spring. So we’ll see what happens.
Come back and we’ll see what the experiment says. Is it true? Are they going to actually germinate? I hope they do, but we’ll see. It’s worth a try.
But then just to show you this, too, it’s like you don’t want to put the water on with any like really hard pressure because your seeds are going to fly around. But you do want to soak through all of the soil. So when that starts running out the bottom, I’ll stop when the water starts running out the bottom, if ever. If not, then I’m just going to stop anyway when I think I’ve done enough. That really should be soaked through. It’s running through. I see it. BAM! Okay.
And I’m going to cover this thing up. I don’t need tape or anything. That’s why this method is kind of.. I like it. But I’ll close that when I’m off camera because my hands are kind of messed up, but I need both hands. But all righty! See you soon!